Tag Archive: The Vaporist


Vaporization, as well as the consumption of weed that has been vaporized, is a big health topic. There are so many medicinal benefits to this God given herb. Through Vaporization, the oils, and crystals within the plant evaporate and are released as a mistyvapor, which can be inhaled and enjoyed for it’s many benefits and effects.

In this section, we will explore vaporization techniques, stories, and all connected topics, as well as review the functions of various models of vaporizers.

Please remember, the purpose here is to encourage correct usage of vaporization, and to answer questions honestly. No question is too silly except the ones you do not ask!

Having a positive experience when trying vaporization is the goal here.

Seeking The Vapor Trail

Vaporization of herb has been going on forever. I have enjoyed it since I was a young man. My first vaporizer was in 1972. I bought a glass dome that is still available on the market today.

Your first impressions, and effort spent, as well as the effects of Vaporizing will dictate your attitude toward this fantastic way of staying high.

Vaporizers all have a heating method, but the delivery systems are not the same. I wont get into a lesson on the mechanics of it, until later if anyone has questions about specific models.

The high is lighter, more alert, but very obvious. It is longer lasting. The heavier.. body high cannabinoids, are usually left behind and unused, so I used Vaped weed to cook.They call already vaped weed ABV. We will discuss this too.

Especially true with the portable Vapes is the fact that every vape has it’s own type of learning curve. This will be the period where you get used to your unit.

It is very common for a new Vaporist to suffer buyers remorse the first couple days.

What is important to avoid is the “other pasture” syndrome. This occurs when others with other makes or types of vaporizers speak so highly of theirs, that you become dissatisfied with yours. Don’t fall into this trap.

When others brag about how good their vapes are, and others agree in forum, , trust me. They are talking design.. function.. customer service…. They are not getting more high than you, just maybe more easily!

If you legitimately want another style of vaporizer, that is understandable.

If you get more than one vaporizer, be diverse. don’t get two that do exactly the same thing.

They can be broken into 2 general categories;

Solid State and Portable

Some units can function as both.. but the portables have different levels of portability, and heatup times.

if you really want to know the differences google is your friend, and I am not here to rehash web stuff at you!

Everyones life is different, and our medication needs vary.

I feel people do well to have 2 units. one at home and one that is portable.

I own a dozen Vaporizers ( yet to this day I do not yet own a “bag type” unit.)

I have narrowed my daily vaporizers down to 4

My 4 Vaporizers fit my needs, and provide what I consider the categories for me. We are all different

I will post the videos here to this site of my demoing a blast with my favorites later, but now lets talk needs.

I use:

1- a heavy hitter ( My SSV- Silver Surfer. I prefer the hand helped wand)

this provides me with a sit down session of any duration. I can get as thick a

vapor as I want every time, and can get more medicated than is needed

2- solid state Light weight. One that stays plugged in and on 24/7 . I ordered a

MyrtleZap for this. It is a log style vape, that uses minimal weed for a couple good

blasts. (I will do a “Zap” video , but you can get the idea on youtube)

3- portable for full session ( My Vapir NO2. it uses minimal weed, and you must

preheat it then once loaded, you can ape for a full session- for me that is

10-15 minutes.. 8-10 pulls.

4- fast blast (Magic Flight Launch Box) good to do a couple real fast vales on the

move without heat up time.

Those are the 4 that I like to use.The SSV is the sturdiest, and my favorite.. I jokingly tell people when asked where I keep it, that “He has his own room”… and he does. Vaporization is VERY important to me. So are edibles made from vaped weed.

Comment back!

Join the thread.

Don’t belittle anyones opinion.

Don’t chastise those with less knowledge ( you were there!)

Don’t envy those with more Knowledge ( you will be there soon!)

PLEASE.. do not badmouth any manufacturers here.

Speak only the truth.. facts.. not hearsay.

If a friend tells you his “magicdoozyvape sucks”.. that is his opinion. Do not say as fact that it sucks. Try “My friend is not happy with his”!

This forum will soon get the attention of Vape makers, and supply sellers. They will begin to show some “discount code love” to the forum members.

The manufacturer you badmouth may remember your name, and he may make a ape you want next month, and you may need service.. so talk truth and don’t bash!

Watch this thread!

Feel free to like Tucson Vapor Trail on Facebook, or get new links all the time from AZVaporTrail on Twitter.

Welcome to the Vapor Trail!

All Vaporizers require a heat source, and a delivery system. Solid state units use electricity. Portable units use either heat from a lighter or other portable flame, internal butane ignition devices, or rechargeable battery.

I personally think of my vapes in 3 ways

Portables for single fast blasts

Mid sized vaporizers that can be moved about, and can often be portable

Solid State Vaporizers

I love my vapes. I have many, and have tried most. Each has a learning curve to it, especially the portable ones. You have to take a day to learn each.. and most new Vaporists think that they are not that crazy about their choice on the first couple of tries.
I tell people to use “bunk” weed the first day, to get the feel of the unit. Once you are able to get some of that to vape, some potent strain with some real oils will be a snap. Don’t waste the good stuff on your trial “blast”!
I tell folks also to look at some YouTubes while deciding. I find them informative, not in quality ( it’s rarely good) but to see how easily they manipulate the unit they are showing.
I’m gonna show you a blast on each of my favorite 3 vapes.
I show my “Fast Blast” (MFLB), “my full session on the move” (Vapir NO2), and “The Workhorse” (my SSV)
Image

Image

Image

There are many vaporizers out there, and there are many people here interested in learning about this. Arzona just made Medical MJ legal. The vaporizer business is about to rocket off the charts, as readers learn how absolutely appealing a “practice” that it is.
In my home area I made a clearinghouse of informative links for vapor enthusiasts (you will see this website linked to it too!) TucsonVapor Trail
The problem is now, that there will be a bunch of scammers, and cheap “knockoffs” of legit vapes out there. People that do not try to do it correctly…. even with a good vape can be discouraged. Imagine the discouragement if they buy a cheap little vape that falls apart or does not function to specs.
Let’s guide the new vapor enthusiasts in a proper way, so they don’t get burned! (no pun intended).

*Variations-

To each type of vaporizer, you will find that there are many customizations that can be made both to appearance, and more importantly to function. You will see posts about people’s favorite bongs, and “bubblers” to use along with their vaporizers to make the experience more exciting, smoother, more euphoric, and just for fun. I use straight vapes. I did make a device to demonstrate the concept of Vaporbonging, just for the fun of it.

I poked a hole in this empty prune juice bottle to show that us old guys can have a little fun too!
Just for fun!
The Prune Juice Bubble Bong
Image

Last night I saw a question about making a cheap bong for an MFLB.
I had to wait until my wife left for work, because I had no soda bottle, and I was about to poke a hole in her plant mister spray bottle!

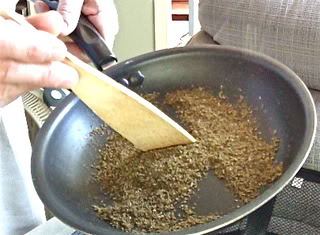
Vaporizing Other Herbs

I have been enjoying trying variou s herbs for vaporization for a long time.
i found charts of temperatures at which to vaporize the various herbs. There are not any complete lists of temperatures, but when you try any herb, just start low, and work up.. you learn fast enough.
I decided the other day to get the feel for each of the herbs.
I collected 50 herbs (I imagine there will be more in this collection before this experiment is over)
I will do my very first Vapor hits of the day, before I medicate, with an herb.
I will give each herb I try a few days to see what the effects are.
Image
I will compile the complete findings and post them, once my personal study is done!
The SSV (Silver Surfer) will be used for this entire project.

Although my wife is a certified Caregiver, she is a bit leary of using my tools (shes not scared of passive inhalation.. just draws the line at potential direct!)
So.. Here’s a tip about your whip—> When I get buzzed, it is easy to make mistakes. So I keep a colored tip on the one that is only for “the other green leaves”. That one, my wife knows which safe to use.
Photoon2011-05-17at0902.jpg
clear = Vito is clear to use this whip to medicate!

Grinders

Grinders

I lovingly pulled my bud apart hair by hair, to prepare for vaping. I was THAT old school about it.

I stepped into the future with my acceptance of grinders. I have tested a bunch, and stuck with my faves. Some weed gets put through one, and then a vial is prepared for another vape that uses a finer grind (MFLB for example) and that weed is sent through a different grinder!

dailygrind

I was the diehard that didn’t believe in grinders!

DSC01707-1

I made this one just in good humor. It is in no way a grinder comparison or demo. It is just me getting my meds ready for a days routine vaping.

Please note. I do not necessarily consume all of the herb you’ve seen me prepare. I may share with another vaporist, or may not have to prepare again for a day or two.

I guess what I am saying here, is I like this community, so I am sharing of myself, that you know me better!

Plastic?

I got a good plastic grinder today, as a sample, along with an order. I love this thing , and wanted to show it to you. This video, starts out with a comment about some cheap items I was not happy with, and I show a “credit card grinder” also (but I was afraid to put any meds on it, for fear they would scatter!)

The Dragon Chewer, is made of mold injected plastic. The teeth are sharp and not glued on, but built in. It acts as an airtight carrying case, and is unbreakable.

It comes in packs of 3 (small medium and large) for $16, free shipping.

This is the first and only plastic grinder I have ever recommended!

Tools for cleaning your grinder-

photoon2011-09-15at1448

Touch image to view the Grinder bath

Pour the solution onto a smooth plate and evaporate .. scrape up with a razor blade.. and vape, this rare delicacy!

Maintaining an SSV type Wand/whip
(What’s Wand Hash)
  SSV- Silver Surfer. The heavy hitter in my home. I laughingly (and lovingly) tell people when they ask what room I use the SSV in, I say ” He has his own room”. Like anything, you must maintain the wand. Here we will touch upon the topic of saving the oils from the vapor, and a situation unique to wand/whip style vapes, “wand hash”.
 Here’s my story… and I am stickin’ to it!—>

With my Silver Surfer, I do carefully go around the edge of the screen after each session(with the pick), and before the next filling, I stick a stiff tiny brush inside, and give it a once around. I then suck hard on the wand end( I never blow from the mouthpiece… this adds moisture into your tube and wand that will disrupt the ease of oil removal later). The dust in your mouth is soluble and inoffensive to swallow.
After a day or maybe two of much use, I seperate the wand, mouthiece and hose.
The Wand with wand facing down always.. I use a chopstick to poke the screen out (downard to avoid crumbs sticking to oils in wand)
The screen has a clay like substance caked onto it’s edges. Use a small knife to carefully scrape that off onto a receptacle. (it is very like hashish- put it into a cigarette or “J”).
take the screen in a tweezer, and ignite it. It is very flammable. let it burn and blow it out now and then and sniff the vapors. Eventually it will stop lighting. When it is cool.. hold it and brush it off with a toothbrush on both sides… It is like new.
Keeping wand upside down for now, get a q-tip and dip it in everclear… swab upward around where screen met the glass until it is clean.
You are now ready to clean. You can just clean as described or you can collect the oils as well.

I use Iso (91%) only to throw stems and debris from raw unvaped weed. I collect forever and use as a liniment. I have recently been converted to Everclear for actual cleaning of “parts” in that there is never remaining bitterness or toxins even if not rinsed like crazy. This also renders anything that you are working with consumable. ( I use it in my “vaped weed” reductions.).
start with borasilicate glass mouthpiece. Pour a shot of everclear into it carefuly, using thumb and finger to keep either end closed. Shake it well.  Set down mouthpiece. Then always manipulating things so you dont spill, you will carefully release the shot of everclear into the tubing, and carefully slowly raise one end and then the other so everclear has touched all inner walls a few times.
Finally, put thumb on the bottom end of wand and pour from tubing into wand. set down tubing and then use fingers to seal ends of wand and shake hard.  If you pour that everclear shot onto a dish and leave it out away from flame, it will evaporate in a short time, and you can wipe a paper in it and roll with it or collect and use the oil other ways( it is clear and clean!)

Finishing the job
Using hot water- I put a few drops of dawn into the mouthpiece, and fill with hot water. I shake vigorously, and then with the soapy water, I repeat the steps above… but after wards, I rinse VERY well with hot water… each of the 3 parts.
Reassembly
I take hose outside, and holding one end, I spin it around forcefully a few times to get the water out.
I use my hand and seal the hose end against a vacuum cleaner if I have no clean hose or am in a hurry, and let the vaccuum suck through the tubing for 60 seconds. NOTE* The hose will smell fowl, and replacing it is the only way to eliminate this, but when you start reusing the hose and new oils coat the clean hose, it will not smell anymore- personally I replace my hose but save the old ones.
The glass is easy… I use my computer air sprayer for both pieces- takes a second.
dont forget after you put your screen back into the wand to pop the rounded side up so your herbs sit on a screen mound rather than in a screen depression. This is important for proper hot air circulation.

About “wand hash”–  As you vaporize, the weed closest to the screen is temporarily acting as a filter for the vapors passing through from the heat source. The weed therefore  ( you notice when you stir) is moister than the weed at top. I personally try never to put well ground herb in.. I try to meticulously hand break up well dried buds into small chips and pieces the size of a chili seed.When you stir , the moistish vapor touched weed at the bottom would like to stick to the screen a bit. My best tip is to try to not blindly stir, and scrape the screen with the poker, as you round the edges. This done repeatedly between hits forces bits of dust through the screen where it gets locked around the edges… even a brushhing can just pack that moist dust down farther. This “wand hash”, then actually sits and absorbs small amounts of passing vapor, which gives it that clay like texture.
When I use herb  that is not too powdery, in hand broken fragments, and stir very carefully and do not “bust up” the “stirrings”… and then make as little actual “scrape” contact with the pick point I find only a fraction of the buildup.

About the screen placement:
I was first curious when I got my SSV as the screen was placed as described. I popped it down.
I then got extra wands, and they all had screen mounded as I described.
I read the manual, which said… “after inserting screen, be sure to flip it over before popping it into place.”
I left the screens and tried, and got much better hits. I called 7th Floor to ask , and was told that yes.. the screens should be mounded , and now I see why.
When you use the screen as a “u” shape… downward, the screen is already in contact with the glass at the edges(wand hash zone). This allows air flow through only the dead center of the wands orifice. When the screen is mounded upwards, there is only the screens very edge that faces downward that sits on the glass ( but is not nestled against it.
This allows hot air to flow through more area of the herb sitting in the wand.

Avoiding Wand Hash Buildup
Everyone has been talking about whether wand hash is worth smoking, and ways to collect it… ways to get rid of it and clean screens. I have a simple way to put off screen cleaning and wand hash buildup.
Sometimes I am going to put in a long day, with my SSV going for 10 hours. I want constant and consistant hits. I do NOT want to disturb my THC oil buildup in the glass wand at all, therefore I do not want to poke my screen out to stop during my “workout”, and reinstall it.
Always keeping the wand facing down as in the image below, I aim a clean dry paintbrush upwards, angled to where screen meets glass. holding the paintbrush steady, I twist the wand in either direction. I angle brush the other way, and twist in opposite direction. I then lift the upside down wand to my lips and suck forecfully. Don’t use air blower, it will disrupt the nice clean oil buildup- remember we are not trying to avoid oil buldup, just wand hash! Do NOT blow through toward from the tube end down… you will only add moisture to the screen from your breath, defeating the purpose of a dry brush cleaning!

The wand I use now started clean and is now on about hour 7 of constant nonstop use. This is the 5th time I have repeated the dry, upside down “brush and suck” cleaning. (also- I am using carefully broken up tiny chips and pieces of herb and unbroken red hairs- no dust) You can see the clean oil buildup in the glass wand. In the shot below, you can see a screen, that is almost as good as new, with no residues built up in edges where glass touches screen.
I am not collecting wand hash on a day like this, I do not have the time to stop and clean and work on my screen. I want clear free flowing hits, and after hour 7 it looks like the next 3 will be a breeze (a breeze of thick rich vapor!)
I will still need to remove and clean or replace my screen… but not today!

IF I WAS COLLECTING WAND HASH

I would take the plate of “wand washings”, now evaporated, and scrape the golden oils together with the reddish brown wand hash renderings, and make it into a ball of hash. Use pollen from a grinder sifter to add substance if it is too gooey. It will be tacky. I carefully use my fingertip and thumb tip of one hand, and just the very tip of 1 finger from the other hand and a single edged blade (carefully!), to manipulate the ball of hash I am making, to avoid spreading or wasting any oils.

How I set my wand down between hits, and not spill weed

I use the soft padded case that my Silver Surfer came in. I am in the habit of leaving the wand there not only with herb, in between pulls, but when empty and waiting for me to return. This bag sits within arms reach of my SSV.
If you dont have your SSV bag, use any similar bag, or a basket lined with a towel.
(even when sitting and holding whip between draws, I naturally roll the tube as you see it here, and hold wand facing up, but ready to sit in that bag)

I found that when I order wands I have a preference too. Although all the wands semm to be the same total length, the placement of the ridge ( ripple- where the screen sits) differs ever so slightly.
I prefer the one on the left. I can put a bit more in the bigger one if I want, plus I can use my breath control to “conduct” air flow… and when I slow down, I have that extra tiny fraction of an inch that helps me never toast the top.  I also get more room to stir my “portion” upward after 1st hit, while it is still “clingy” without any close spills!

I found a very handy brush to clean screens. It is the same brush that comes with the MFLB.
I usually order this brush from Vapeworld, because they are so fast and the shipping is always free, but I needed a bunch of them to share with members of a local Medical M.J. group, and I found them here for 18.95 for 10 brushes.
Be aware that if you order these bulk ones, they may not all be perfect. If you want perfect brushes, VapeWorld carefully inspects all of theirs!

I like the paint brushes too. For a real “pro” brush, you can Google “angled eye shadow brush” and find these for from 2 – 6 dollars
(soft)

For another great tool, that I got to clean my wands, and adjust other screens, check outhttp://www.halfbakedgoods.net/vaporizer … -pick.html

if you go to Half Baked Goods, they have a 10% discount code DEC31 that is good until New Years eve.
I got it for screens etc, but I find it very helpful in maintaining my grinders. (keep it away from the grinders pollen screen though, if you use that type of grinder!)

Touch this link to view the  3 Types of SSV Wand/Heater Cover Connections

Vapor Play; Flights of Fancy

My SSV, a Fine Bud , and a……DoggyBag?

A Tale of This Morning’s Buzz
Some bud vapes better than others.
Once in a while you get some really rich vaping bud that seems to go on hitting  forever.
I can finish off a wandful of most herb in about 10-15 “deep ones”.
Today’s stuff, even at just a pinch takes me 25+ “pulls’ on the mouthpiece.
As it vapes, the herb does not tan, or brown, but rather “reddens’ a rust tint.
By the 5th pull, my eyes are slits, and I am debating whether to set it down for a breather (big advantage of the SSV Hand Held Whip). But I hate to set down an unfinished wand. I will return to a half done wand when I have to, but I prefer to take it all the way.
5th pull left me debating. So thick were the clouds of vapor I could not resist.
10th pull and the clouds were not slowing down (mind you it was only a pinch). Early morning, and I was baked.
The reddish “stirrings” were not crisp at all.. still thick and clingy on the pokers tip.
I could stop and save this glorious serving but…..
I looked over to the right and noticed a box of trash bags. I got this idea. I would save my vapor as an experiment. No special vapor bag, just a trash bag full of exhaled vapor. I peeled one off it’s roll, and  I gathered a mouth hole at the open end… seemed OK.
I took a long slow draw… carefully angling the wand this way and that, to get optimal airflow at every juncture. I felt the perfumed essence permeate my entire body and brain, as my own thoughts echoed back at me. A tiny sample exhale told me this was another whopper. I blew into the bag as one would a balloon. I repeated this until the bag was full, and by then so was my mind. I put the almost, but not quite totally vaped wand in its safe upright spot to come back to later. Floating, I tied a twist tie around the bags opening, set the bag down and got in the shower. I am an Med M.J. patient, in severe pain, so always shower immediately following a morning session. I dressed to start the day.
I went into the “Vapor Room” for my next vape and saw this strange filled up trash bag on the floor.
I remembered. But it had been just over an hour. I opened the bag a slit, and sucked deeply.  Tasted great! I exhaled, waiting to see if there was visible vapor to support the nice taste. Woosh. A cloud! I sucked it all out of the bag over the next 3 minutes. Got to feeling great too!
The inside of the trash bag was tacky, my mind was loose, My next wandful was put off for an hour or so for having reused my vapor. Not something I would do every day, butI will likely do it again with some particularly “misty” bud!

A Realization

I have not used a cigarette lighter or match in a year. Pure Vape.. that’s it.
Of course I am arms reach from a unit, 24/7!
I realized today I am spoiled ~ my taste buds can no longer stand chemicals.
I smoked about a “J” a week… mostly to test out new strains flavor. I decided to stop for a time.
I have made tinctures, and oils and edibles with my vaped weed, but not in a while.
(By the way please note, I am totally baked now from the effects of yesterdays work)
I realized that my weed poo jar was filled to the top. I had a half gallon jar full of ABV from Medical Grade herb. Time to tidy up.
– made 3 Firecrackers to eat for the project.
– used Alchol to wash tubes, wands etc.. allowing wand hash to disolve as well, poured on dish.
– used 1/3 of the AVW to make green dragon with Everclear
– used the rest to make Cannabis Olive Oil
Project done in 4 hours
I taste tested everything edible and was already zoned.
I took the plate of “wand washings”, now evaporated, and scraped the golden oils together with the reddish brown wand hash renderings, and made it into a ball of hash for the morning (today).

It was glorious, and a great buzz.
Two things stood out and both amazed me.
1- the nugget of hash tasted just like some Lebanese hash as I inhaled the smoking vapors (Great high too)
2- As I exhaled the thick plume of Hash smoke… I tasted butane!
Vaping and not smoking at all has made me more sensitive to the chemicals. I used a hemp wick to smoke the rest of my nugget, and I owe Vaporizing a debt for making my body and senses more aware of Chemical presence!

Watch Wand/Whip Cleanup


Vapir NO2

VAPIR NO2

I start out at 373… works best for me. herb will brown too fast if the chamber is too full. I fill 1/2 – 3/4
Air needs to be able to flow around the bud in chamber to make it vape AND stay cooled enough to last 8-10 pulls. If chamber is fuller, it will last 5- 6 pulls as the bud is toasting with a slower restricted air flow.
Vapir NO2 is the best portable that can give a FULL vape session, while moving about. It is also VERY efficient at using all material within!
NOW…
I am so excited about this carrying case I got, I must share!
It was 34.99 Free shipping
It has a great handle you can’t see in the image.
It came with free lock and key not even advertised with it!
I ordered it yesterday, and it arrived today (18 hours!).
I can’t say enough about it and all of it’s features.
*Note the supplies in the bag and the bud in the stayfresh included bud pouch (velcroed in place) were NOT included!!

The NO2 while portable is not a “fast blast” like the FireFly or MFLB.
Where the NO2 comes in handy is when you want a full vapor session (mine last 15 minutes or so, about 10 pulls), and still want to be on the move. (I ride the power chair, and walk the dogs with mine, or on a drive)
I found one tip for heavy users that is helpful.
If you give it alot of use, there is a THC oil cleanup that must be occasionally seen to at the very top orifice, where the tube connects to the unit.
Golden clear THC oil can trickle down the tube when you set unit down between uses. I know many like that to let that oil build up, but in this unit, you can’t, or the oil eventually will enter the orifice, and after time it can touch the top micro screen. When I see the buildup occurring, I just stick a toothpick in the tube and do a once around. If you can’t stand to let the drip of oil go to waste, spread it on a rolling paper. (or on tin foil-use lighter under then sniff the vapors!)

The only thing about the NO2 that is a very minor inconvenience compared to MFLB (which I really do like too… watch for the review) is the fact that it must be preheated. The preheat is pretty fast though, at about 2.5 minutes.
I use it more, because it gives me a controlled temperature. This allows me to take longer hits of varying depth, and I get a full vape session of 10- 15 minutes before the material is consumed. There is no concern for timing or battery depletion during my session, and I can go two sessions on one battery charge ( though I rarely do – I plug it back in when I am done or I plug it into the car charger if on the road.) If I am in car or near electricity I have the option to use the unit plugged in.
I am disabled, and walk with a cane. I like my MLFB for a fast blast or attitude adjustment, but I never have to “shake up” the NO2 like I do my MLFB which allows me not only a longer, complete vape session on the move, but a smoother “gate” when I am walking, since I do not have to stop to shake up my blend.
* a side note- most NO2 users do not know that you can change the temperature while you vape. In middle of session, just turn power off. use the temp controls to set new temp , and then turn back on… since it is preheated, resetting itself to the new temp is a piece of cake for the unit.
My reasons for portable vaping-I was a “J” smoker. This made “firing one up” anyplace I wanted easy, and I sure could do it on the move. I have enjoyed Vaping for years. When the Doctor recommended I start exclusively vaping, I willingly complied! I obtained various Vapes. I got tired of being “tied’ to an outlet. I found it very conspicuous and not simple to move about with a balloon in hand.
I studied the portables, (I had an Eagle Bill Glass Shake &Vape, but it requires 2 hands , and shaking) and decided on the VapirNO2. I love the unit! I then decided to collect, so I could have all “appealing” alternatives to get comfortably baked in a variety of situations and locations, despite my limitations.
Arizona’s Medical Marijuana community is new… the law only passed recently, but I was prepared. I was certified on the first day. My wife was one the 1st 5 state certified M.J. Caregivers. As such, I want to be prepared. I wish to be comfortable with the economic picture and “ease of use”  for the portables on the market, as I am now in the position to help a very large community of disabled people to learn about alternatives to combustion, while reminding them that this can be done in other locations than at an electrical outlet!

Please note… my SSV standard with a handheld wand still is #1 in my home!

Although I still am using my original tubing and mouthpiece (mainly to monitor original part’s longevity)I could not agree more. I am a big Borasilicate fan!
For exactly this reason, here in my local Medical MJ Community, I recommend to those who own the NO2 to aquire this borasilicate mouthpiece (available at Half Baked Goods) and Tygon© tubing (available almost anywhere).
original tubing and mouthpiece on the right
I have these replacement parts myself here to use, when the time comes, but for now I am monitoring the products original pieces, as with all of my vapes.

Changing the screen-

Do it by hand. Firm grip … don’t use fingertips use side of finger.
It either gets easier, or you get stronger.. first time was hard for me .. now it’s easy.
tip: to re shape a new screen if it gets misshapen is easy with any small cylindrical object.

If I need both hands to do something while vaping, I slip the unit in my pocket. It stays on for 20 minutes of inactivity.

WARRANTY

OK guys- now to be fair I will tell you the warning I give about the NO2.
It is not about the unit , but about the Warranty.
Vapir is DEAD strict about warranty conditions. If you really care about warranty, you MUST buy the NO2 from an Authorized “Air2″ Distributor”.
There are tons of NO2s on the web at competitive prices.

As a portable, and for enjoyment… I love using it!

The Omicron Vaporizer for Concentrates

I just received delivery of the Omicron Vaporizer, for concentrates.
I now check the battery to learn that it was shipped with an appropriate charge.
I have acquired some hash oil (not made from Iso) from a local Compassion Club. It is approximately a gram. Near the oil, you will see an envelope, and a metal cone. This is a filling kit, that Planet Vape was kind enough to include, to facilitate the cartridge filling, which I must be done with care.
Watching a couple of videos before receiving the Omicron definitely helped with the filling of the cartridge.
Those that own the Omicron, can relate, I am sure to the pride I felt after getting one full gram of almost solid glue like black hash oil out of it’s vial, and successfully into the Omicron cartridge.
It did take about ten minutes to accomplish, but I did not spill a drop! The filling kit helped!.Since the battery only allows a 6 second engagement, I used a triple hit technique.. taking three 6 second hits, before releasing.
The vapor and flavor production has improved since this video, as the glue-like oil, has finally settled to where it is supposed to be!This is the second day of medicating with the Omicron, and thanks to you guys… my technique has improved… as far as the priming… (I was being too gentle). The battery took me through the past 24 hours, and is  charging now.
I have gained  a new admiration for the Omicron. The  hash oil vapor delivery is not the monster hash oil hits from dabs of oil on  a “skillet”. The hits are measured, and are therefore a nice way to ease into your level of medication.
I like to stack a few hits as I did in yesterdays brief vid, for a richer effect.
Although I have access primarily to flowers, and am in no position  to make my own oil.. I will make it a point to try to keep myOmicron in oil as I can.
It medicated me effectively, and with very little fuss…….
*************************************************************************Posted Image
Day 7
Time for a review of the OMICRON by THC Scientific, which I acquired from PlanetVape on this 7th day of using this device specifically as a medical tool, I took my 100th hit medicating.
I wake early from Spasticity, and I know beyond doubt that I will soon become violently sick to my stomach. I do know the approach of the Beast, however…. I can sense him lurking, and I can smell his foul breath.
“I know you are here Monster”…… and I reach for the Omicron, at bedside, in it’s upright holder.
Confident now, after a week with how many times it will take to prime… I begin the ritual…
Almost like a mystical medeival formula….. I touch the button repeatedly….. and I am ready.
Filling the cartridges is not hard at all, if patience is employed.
Ones first attempt to fill a cartridge will seem hard because you will likely be very anxious to get that 1st taste.. and nervous about waste.
The instructions are a tiny bit intimidating… when it comes to the priming……. BUT.. this is not overkill… because this does make us cautious, after that first nervousness….
And I believe that the Omicron merits that nervous caution, when learning to use it.
If a 60 year old man, with spasticity, and limited use of 1 of his hands can do it, almost anyone could!I think most of you here know me.
You all know I am quite the opposite of wealthy.
I just bought a set of cartridges, not knowing when the next time would come that I might be able to have hash oil……
THC Scientific.. Kudos on an amazing 2 day delivery!
I already tested all 5 and they are all perfect.

I am mostly a fan of fresh green flowers.
The fact that would buy a set of cartridges knowing these things about me should be review enough!
I will use the Omicron as I can keep the carts filled, in the mornings.
You guys, at THC Scientific, keep up the good work.
PlanetVape’s interest and communication with me after my receipt of the Omicron speaks volumes about where their heart lies in all of this…

100th hit from one gram, done – and I will continue counting.
as for you, BEAST….
I am armed!

They come with various “skins” also!


Magic Flight Launch Box

The recent popularity of the MFLB has us all trying new techniques and accessories, and testing batteries. Truth of the matter is we are doing more hits! Good for the herb industry… good for our buzz! Folks are noticing irritated throats. The temp of the vape is still 350+, but you are only 2-3 inches away from it as opposed to 3 feet! People use water etc, but there is a very simple draw technique that cools the vapor before it hits your throat. My love for doing hits of grade A pot and my love of my Imac camera inspire a very short vid about my own draw technique that involves sipping, but not directly inhaling each sip. Savor the vapor in your mouth for a brief second in time… then inhale! A new installation of MFLB Power Adapter Appreciation, as I rave on about how much I like the PA setting potential!


Things to do with ABV(Already Been Vaped Weed)

I just finished another batch of ABV tincture.
I used a mason jar, that is my avb collection jar.  It was a one quart jar that was exactly half full. The weed weighed approximatly 17 grams(just over a half ounce)
I covered it with everclear (190 proof-95%alc) completely and shook vigorously, then set the jar in the sun for two hours. I shook again very vigourously.
Next I folded a coffee filter in 1/4s to make a traditional funnel. I poked the funnelled filter into a seperate clean mason jar, and poured the dark alchohol mixture through.
I squeezed the hell out of the filter when it was done dripping, to get the last drops.
I then evaporated it
(I use a pot of not quite boiling water… and I set a pyrex measuring cup within that hot water, then turn on vent, and pour the tincture in the measuring cup.. it works fast)
About it not becoming too thick
When it is well evaporated, I pour it into a clear amber glass bottle that has an eyedropper.
I leave the top off the bottle and let the bottle sit open for the afternoon, near an open window so that a breeze can touch the open bottle.
I check the bottle every couple of hours.. by “swirling it” to see how it sticks to the bottle walls. if at any point it clings to the glass, and coats it- I stop. I add from the clean still unused  dropper ONE drop of everclear. I am done.
If it just barely coats the bottle, but does not actually stick to the walls.. I stop and add nothing it is perfect.
You can test it, by using the eyedropper, and put one drip on a dish. touch it with finger, and then “contact thumb to forefinger tip a couple times to see if it starts liquid, but becomes tacky after a couple touches.
The mix today started with 17 grams of herb, and  it rendered about a cup of dark colored ( green) everclear. After all evaporation and the mixture was thickish but not tacky to the touch.
The resulting tincture is just a little bit under 1/2 of a one ounce dropper bottle.
I put 4 drops under my tongue ( watch out.. very bitter) and an eyedropper full down my throat, and I get pretty buzzed. This can be used in a candy recipe too, , by proportioning the  amount of tincture vs water… there is very little alchohol left now.
Yesterday I did this project but with a bit more abv. I did it with olive oil instead,  of alcholol, and cooked the weed in the olive oil in the oven for 30 minutes at 300. then let it cool and I strained and squeezed out every drop (medical examining gloves and a collander. squeeze it like handfulls o f dirt!).
The brownies from this oil are cooking now ( Saturday Morning fun).
I already have had a glass of apple juice ( room temp works best) with a full dropper of tincture.
In answer to the main thing you asked…. about it becoming TOO thick. I do final evaporation in the pictured bottle. The small top of the bottle gives you VERY controlled evaporation!
Oh… the most amount I personally ever put in a tincture was  1.5 ounces of avb. remember… the everclear must cover the herb, and you will need to have vessels that will not be cumbersome when it is time to pour, and transfer, and filter.  I never use a jar that can not be covered. Mason jars are a good size, and wide mouthed .. and if you need to step away, just cover them up.
Everclear is the highest proof alcohol you can get. always stay venilated!

Health food stores.. The “hippie” kind of places, that sell bulk foods and incense and bodyoils etc.
Some GNC stores have them (General Nutrition Center)
Ask for a 30 ml mixing bottle with pipette for essences

I went into a local “Sunflower Market” for mine. They may be in your city too.
http://www.sunflowermarkets.com:80/Default.aspx

Vaping at the Stovetop

The heavier cannabinoids release with heat at the highest temperature. I mostly use my vaped edibles for rest and relaxation (and better sleep).
How about a short edible AND vape story of an experience from RIGHT now… brought to you live!

My  “Stovetop Sniff & Whiff Vaporizer” light prose/true story real-time
(getting vaped while cooking)
I’ve been collecting ABV for years from very high grade medicinal MJ. I also use it regularly, but sometimes supplies dwindle.
I use edibles to sleep, and to get pain relief.
Low today on ABV, and regrouping my collection, I needed to create a nightime edible, without also depleting my green Dragon stash, or daytime “treats”.
I sure wasn’t going to cook with my unvaped “meds”!
I acquired some good grade “comersh” sativa for the brownies I was about to make.
I don’t cook with totally green herb.
I sure couldn’t vape an ounce of herb in a sitting!
SO…..
I threw the sack into a blender on low, to not smash up any seeds.
I ran the ground herb through the strainer.
I stuck the debris from strainer in Olive oil in the oven at 300 for 35 minutes.
I put the clean herb on this frying pan, and I……..
(here’s the part where I got baked!)
Photoon2011-05-21at1555
I heated it on a low/medium flame and stirred constantly as it heated.
As the herb turned a light tan, whisps of vapor rose, and that Old familiar scent  danced upon the lining of my nostrils. “Ahh… vape”.  As I stirred I breathed repeatedly, very close to the skillet.
I realized I was stoned! Not a bad buzz either!
The rest was easy (since I walked the rest of the way on a cloud of vapor!)
Oil strained..  Skillet Vaped weed in the mix… eggs water…
I am baked… and brownies are baking.

The Results!
They were simply great!
I made them in a disposable aluminum round baking dish, so they were Pie shaped.
Slept late thanks to them.
They were more uplifting than AVB brownies, in that the weed was not totaled, only lightly tanned!

Breakfast menu
Blueberries and cream Oatmeal with 3 grams of AVB
Chilled Apple Juice with 4 drops of Green Dragon tincture
1 wand of Afghani Kush –freshly vaped
Here’s to wishing all of you a smooth and worry free day!

P.S. Add a half a brownie for desert… uh oh

About Dosage

Try to moderate your “dosage” you will get to a happy place! All weeds are a little different in strength.
I eat “meds” prepared from green leaf, but I no longer make them myself… I would rather vape my meds, as they are spectacular.
That being said, I cook, and bake, and make butter, oil etc with vaped weed.
Since the more “mind active” cannabinoids are vaped.. the cannabinoids left are very medicinal.. pain managing.. sleep inducing.   You can not generalize what a good dosage is.. nor can you easiliy grow accustomed through “practice” to get to a happy place if you have ingested more than your body needed.
SO….

The happy place

Test each batch you make of whatever “dish” you have prepared… and do some measuring.

Keep track out how much herb you put in the mix use your eye and your head. I generalize that I need a heaping teaspoon of powdered browned unvaped weed for each serving as a start. If the weed was fresh and you browned it for cooking, just prior, it will be very strong, … toasted but not actually vaped.
I consider with vaped weed, 1 – 2 heaping taespoons as a guideline (not for cooking but for eating).
If a brownie pan is to be cut into 16 pieces, make the 1st batch with 16 teaspoons.
then you know what you are eating. 1 piece = one teaspoon.
Test it out on an unfull stomach. eat 1 piece. wait at least an hour to an hour and a half before eating a second one.
If you want to learn, make note of the times.
You will soon find the happy place, quite manageable.
It is not “getting used to it” that makes it just right. It is dosage related. Overmedicating is uncomfortable, and has happened to all of us!

~Vito

SUNDAY-June 12, 2011

Good morning friends. Vaped, and prepared to bake! Except for some previously stored medibles, I have not touched my ABV for a while now. I have gotten down to tinctures, trying not to disturb my “cache” until it weighed exactly 1 Oz.

This mornings load put me at my desired amount! (not going to make butter, or oil, but rather a straight batch of cookies, or brownies, displacing the extra mass with water… doin’ it the easy way today!)

RESULTS

In earlier posts, there are complete instructions for making brownies from a mix… using native (raw weed).

The recipe below is for making brownie like pastries from scratch, using only ABV

Many people make cannabutter or cannaoils from their ABV first before making edibles. ABV is already cooked, and so is already to eat. I do not mind the taste or texture… so this recipe was a fast simple one, as I used straight ABV!

Ingredients

◦    1/4 cup shortening (I use unsalted butter)

◦    1 cup light brown sugar, packed

◦    1 eggs

◦    3/4 cup flour

◦    1 teaspoon baking powder

◦    1/2 teaspoon salt

◦    1/2 teaspoon vanilla

◦    1 oz. ABV (less can be used)

Directions

1.    Preheat oven to 350 degrees F. Have ready a well-greased and floured 8- x 8- x2-inch square baking pan.

** NOTE- I do not use square. Square is easier to cut portions. (I use round pans for personal use.. just a preference!)

2.    Melt shortening over low heat. Remove from heat and blend in brown sugar. Cool. Stir in egg.

3.    Sift together and stir in the flour, baking powder and salt. Stir in vanilla and ABV.

4.    Spread in prepared pan. Bake in preheated oven 25 minutes, until a light touch with finger leaves a slight imprint. Do not overbake.

5.    Cut into 12 pieces

6.    Note: Bars will remain good indefinitely if frozen. I actually eat mine frozen often!

ABV Crystal Pie

This recipe is called “ABV Crystal Pie”. This is sort of a large cookie that I call a pie because I make it in a pie pan. Crystal, because when it is done you will see a sparkle layer across the surface of the cookie, of flat shiny crystals that develop from the evaporation that will take place in the stove during baking.
I begin with 14 grams of ABV …
I use  this jar.

My 14 grams are in this jar covered with everclear (about $15 a liter).

I shook the jar heavily, and will be leaving it in the 113º Arizona sun for a couple of hours.

I will then pour the contents through a coffee filter and will squeeze it out well. I will NOT discard the weed.. it is good fiber, and very digestible, and is an integral part of this recipe.

I will place the alcohol in a large pyrex measuring cup, and sit that cup inside of a large pot of barely boiling water to evaporate (keep flame low.. everclear is 191 proof!)
In a mixing bowl…

I will put:

*1/2 cup brown sugar

*1/8 cup of soft butter (1/4 of a bar)
I will mix this together, until blended and add

*1 egg
I will blend with spoon until even
I will then add

*1/2 cup flower

*pinch baking powder

*pinch salt

*1 teaspoon cinnamon

*The wad of squeezed out ABV
Mix well.. It will be thick like cookie dough

*Pour on the everclear solution when it has reduced to 1/2 its volume.. and mix well.

It will now be a thinner mixture.
Place in 350º oven for 18 minutes

It will be flat and very even due to the alcohol used. I will show you when this one is done!

Arizona Medical RockZaps

You can read about AromaZap at http://www.aromazap.com/.
There have been huge changes in the past months, in the way this herbal vaporizer is made and functions. In the Youtube Video “Mabel Retro RockZap” at https://www.youtube.com/watch?v=qui_Li7pJRM you see me use a tiny pinch of herb, to get cloud after cloud of medicating vapor. The new AromaZap is built of a Solid Stainless Steel core that keeps the same temperature 24/7, and can diffuse essential oils when it is not being used to vaporize.
Now that you have seen the website, and the video and have seen what it is all about, I will share the good news with you. Zapman, and LadyZap, have allowed me to represent them to the MMJ community. Besides already being a collector of Zaps, which many of you have seen in person, I now have a supply of a few of the best new “RockZaps” made. These AromaZap brand RockZapSSS units sell for $180- $200. I have been authorized to show these Vaporizers (I have their complete kits here!) and to sell them directly to cardholding Arizona MMJ Patients at a very substantial medical discount.
If you want to save tons of money on meds, by learning to vaporize, and stay medicated longer, contact me. I will demonstrate all of the units to you, and I can let you leave with one of the RockZaps.Fantasia (Poplar)Vivian (Myrtle – after “Ethel Mertz” a Vivian Vance character)

These are all made of American Wood. The older styles are from many types of wood, and require polish to keep them beautiful.The new RockZaps in these pictures are not lacquered in any way!

The colored ones are stained with food safe vegetable dye.

The lines you see are burned in.
The shine is natural and done using a high speed polishing technique, which you can buff up with a soft cloth (with or without the available ZaPolish)

The finish is primarily Walnut oil and Carnuba wax with not much else. It is applied with the lathe turning so the friction caused heat (applied with a soft cotton rag), this permanently sest the finish in the wood. The friction caused heat hardens it. If color is used, it is applied before the finish.

What you get:
The RockZapSSS, 2 Stainless Steel tipped stems (Food Grade Nylon), a wooden tamping tool, 12V transformer, Copper aroma diffusing cup

What other extras can you get?
There are an assortment of handmade wooden stems, and other attractive additions. You can get essential oils for aromatherapy. Extra stems are available, and for $1 less you can get the extra stems in Lead Free RoHS certified Brass.
Of course, your Zap is complete as it comes, and you can obtain any of the things listed below independently.
Besides the aroma cup that comes with your Zap, you can order custom Aroma Flowers, made by LadyZap.
Glass Tooties (with and without Carbs) are available
Original ZaPolish and lots more!

Arizona Medical Zap Hall of Fame

Zaps Gone by

I personally tested each one of these, and I personally know where each of these Zaps is now.

I am very proud to be able to represent AromaZap to you guys and get you a discount that is unheard of on the web!


Jane (Black Locust- fluoresces under blacklight)

Marylin

Angel (Oak)

Cherry (Cherry)

Rita (after Rita Hayworth – redwood)

Natasha (White Alder)

BETA TESTING The New Medical RockZaP

Beta Testing on The new AromaZap RockckZapSSS.
new AromaZap design in an herbal Vaporizer, with a Solid Stainless Steel HeatPort and a ceramic liner, allowing a higher temperature for vaping.
As you know the AromaZap can be left on 24/7, and can be used to diffuse oils or vaporize herbal material.
Today I was as excited as I have ever been to get home from a trip to the Post Office!
I knew what was in this package already, and my fingers were itching to open it.

The first thing I noticed, was that this Zap was beautiful!
She was not as brightly colored as she appeared in her original photo shoot. The wood grains are very clear, and the finish also was not as glossy as I expected.
Mabel is totally natural looking in every respect, and although buffed well… she still took a layer of ZaPolish and soaked it in.
Slightly more compact than her sisters, she is still a good size.

She came with a special SS Vapor Tube, and if you peek to her left you will see a bushing. This was sent along so that the original brass stems from the Zap could be used as well, since this new Heat Port is a slightly larger bore.
About the stems. They are exactly the same thickness but are about 1/4″ taller.
I tried various grinds of herb, and compared the SS Stem to the older brass stems, and I found I could consistently get between 5% and 8% more herb into the tip if I wished to fill a bit heavier. This may be good, as Mabel the Beta RockZap runs hotter, and can handle a bit more of a “stem”.
The mesh of the screen that is in the new SS Stem is a wider gauge that the Brass Stems.
During Stem capacity testing I did notice that the older brass stems restricted the passing of “duff”… the finer dusty components found in dried average grade bud. The New SS stem allowed a tiny amount of the dust through, BUT, I was testing hard, and using a very dry fine blend for this portion of the evaluation,that one would not likely use.
The brass stem with the adaptive bushing added fits into the heatport slightly more snuggly. I attribute this to an interesting “side finding’… The brass stem seemed, in spite of a slightly smaller capacity, got a hit or two more than the SS Stem. The Brass stem with the bushing also got a darker ABV each time.(smaller screen gauge should possibly be taken into account)
The SS Stem worked magnificently though, and these comments are not by any means recommended changes.. just observations!
You can see that she is much has a natural look to her, and her coloration is an enhancement in my eyes now that she is here.
The grooves are definitely functional. That is without any doubt. It makes here easy to hold.
I can not say I was not forewarned about her warmth. The maker of the Zaps did reveal that these guys would be very warm! They make an excellent tool for warming hands, easing arthritic pain, and giving massages!

The first session, I had to get used to her temperature, by holding her a bit gingerly and passing her from hand to hand a few times. I could see that for some the warmth may be a surprise… but it is like putting your hand around a hot cup of liquid… you do get desensitized after a few minutes and find that you can hold it.
For those with sensitive hands, the bottom 1/3 of the cylinder remains cooler to the touch.
I was working with three stems for the “back to back” hit test.
One was the new correctly sized matching SS stem, and two were brass stems with bushing. Using a handkerchief, I was able to easily switch the bushing impervious to heat, and it went without a hitch.
Mabel slowed down in production on back to back stem 3 but needed only 15 seconds rest to give another hit!
The hits were more evenly divided than with Mabel’s older sisters.
From Ravin’ on up through the youngest ones… They give 2-3 good hits, then the assorted 2-6 finishing hits.
Mabel is giving 6-7 good hits, then 1-2 week ones and she’s done.
Speaking of done…
After this mornings hours of testing Mabel….
……I am pretty “well done”!
The verdict is…. Mabel… The RockZap with the new SSS Heatport is a hottie.
I have one brass Zap that runs hotter (Kushin’), but even she can not perform the back to back hits that Mabel showed me here today.
I certainly think that the extra bushing that was sent out to accommodate the brass stems should be available for a time. I already would like to have 2 so I can devote a couple of stems to use with Orange Mabel, until SS stems become available.

VTV Presents:
Mabel Retro RockZap
This is my favorite of all Zap Videos.
I do nothing but hit the single stem that I filled… over, and over, and over!!
I use the “sleeve”, the brass bushing that has been referenced in this video.
Mabel’s co-star is an Ed’s TNT Blackwood Stem.
Please folks watch as this RockZap, Mabel takes one solitary stem full of herb…
I rushed her along, and still could not finish one stem in 5 minutes.
The number of major pulls she gives from the one stem is amazing!
One stem is a session!

Log Style Vapes

LOG STYLE VAPES

I added to my collection of Vaporizers. I have been a fan of the log style vapes, and had a tough decision in deciding.

It was between PD (Purple Days), MZ (MyrtleZap, & WDZ (Woodeez).

After a couple of months of comparison, the MyrtleZap by AromaZap won.

The Vapor tube you see me using with my “Zap” was made by Ed’s TNT.


_____________________________________________________________________________________________

The ZAP Lifestyle

Photoon2011-06-27at1448
O.K. Vaporists. I now am officially in Zapville. The Yin and yang of Zaps now live together here at my home.
This small collection represents the side of my Vapor Trail that is wood, natural, and aromatic!
I have achieved “The Zap Lifestyle”

In Honor of Zap Behinds
Behind every great Zap…..
….is a Zap Behind!
Let us not overlook the rear end of the Zap.
We always show a gleaming facial portrait type shot of our Zaps….
When there is indeed a great deal of beauty sitting at Mr. Zap’s back door!
8
There is great beauty here.. no “ifs, ands, or … BUTTS”! (Zap Butt that is.)
There is no finer derriere to be seen in the Vaporizer world, so let those girls do the “CAN – CAN”
(for you kids… the can-can is a french dance from the 40′s that accentuated the posterier view)

The Toasty Top